
Kinvert will walk you through the Anki Vector Customer Care Info Screen ( CCIS ). This gives you some interesting and useful information about Vector, displayed right on his screen.
It is a very cool feature and we’ll teach you how to use it.
What is Vector’s Customer Care Info Screen?
Vector’s Customer Care Info Screen ( CCIS ) is a useful tool that can be accessed on Vector’s face. It gives you a lot of information to help troubleshoot your robot.
This can be useful if you’re programming Vector, or if something goes wrong.
How do I access Vector’s CCIS?
Please note that this process has changed at least once. There is a chance you could read this in the future after a change and before I had time to update this article.
Maybe you’re even on an old version. So I’ll tell you these in order.
Old Way
- Put Vector on Charger
- Wait until he’s fully awake and eyes are looking normal
- Double tap his back button (you should now be looking at his name Vector – XXXX
- Raise Vector’s lift
- Lower Vector’s lift
- You should now be looking at the first page of Vector’s CCIS
New Way
- Put Vector on Charger
- Wait until he’s fully awake and eyes are looking normal
- Double tap his back button (you should now be looking at his name Vector – XXXX
- Raise Vector’s lift
- Lower Vector’s lift
- Lower Vector’s head
- Raise Vector’s head
- You should now be looking at the first page of Vector’s CCIS
What Information is on Vector’s CCIS?
https://youtu.be/RGqkasPpuN8
Here list what information is on Vector’s Customer Care Info Screen.
Page 1
- ESN – This is your Vector’s serial number
- OS – This is the version of the software
- SSID – The name of the wireless network Vector is on
- IP – Vector’s IP address on your network
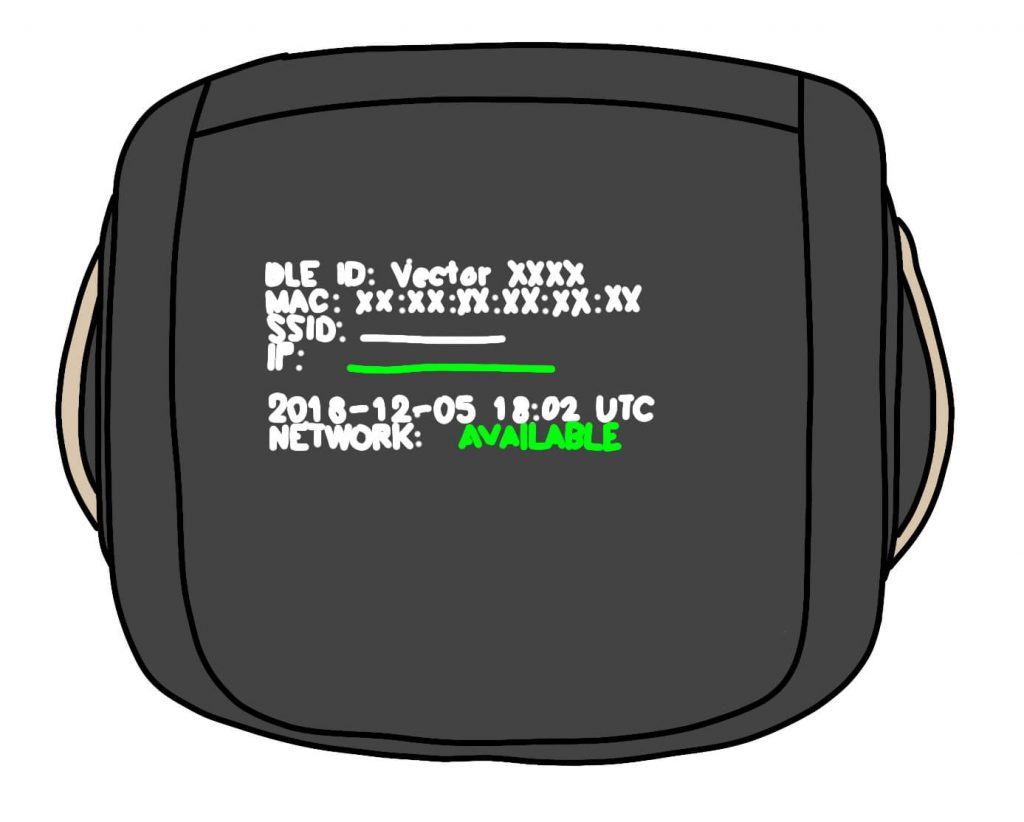
Page 2
- BLE ID – Vector’s ‘name’
- MAC Address – We talk about that in How to Find Vector’s MAC Address
- SSID – They list the name of the wireless network again
- IP – Vector’s IP address is once again shown
- Current Year / date etc
- Network Availability – Whether or not the network is available
Page 3
- CLF – The four cliff sensor readings
- DIST – Distance measured by distance sensor
- I’ll update this when I know what the values in the parenthesis represent. Seems distance related.
- I think the other values are related to is_in_valid_range, is_lift_in_fov, is_too_pitched, is_valid, is_valid_signal_quality, and signal_quality
- TOUCH – Touch sensor value
- BATT – Vector’s battery voltage
- CHGR – Voltage sensed on Vector’s charger contacts. Should be zero when off the charger, and around 5 volts when on the charger
- TEMP – Perhaps the temperature of the processor?
Page 4
- ACC – These three values are the accelerometer readings for X, Y, and Z
- GYRO – The readings for the X, Y, and Z axes of the gyroscope
Page 5
- HEAD – The angle of Vector’s head
- LIFT – The angle of Vector’s lift
- LSPEED – The speed of Vector’s left wheel
- RSPEED – The speed of Vector’s right wheel
Page 6
- MICS – This is the values for the microphone array
Next page is back to Page 1.
To exit the menu, you get to Page 1 and you should see ?EXIT. To exit you raise and lower Vector’s lift.
Other Things You Might Be Interested In
Kinvert writes about many things education related – including robotics – including Vector.
We have some general info on robotics and coding at What is Robotics, Block Coding, and Age to Teach Kids Python.
You can also find other information specific to Vector in Anki Vector SDK, Vector SDK Examples, and Cozmo Vs Vector.
Finally, this is one of many tips and tricks we send out to our mailing list. You can join with the form below, and you can unsubscribe at any time.