
Kinvert will show you how to replace a Monoprice Mini Delta optical endstop. If all 3 arms of your delta aren’t going home, you might have a bad endstop.
We’ll tell you a bit about the Monoprice Mini Delta 3D Printer endstop, how to know if the problem is related to the endstop, how to replace the optical endstop, how to test the new endstop, and what to try if that doesn’t solve the problem.
Let’s start by talking about the Monoprice Mini Delta optical endstop itself.
Oh, and you might also want to check out our article on 3D Printer Repair.
Monoprice Mini Delta Optical Endstop
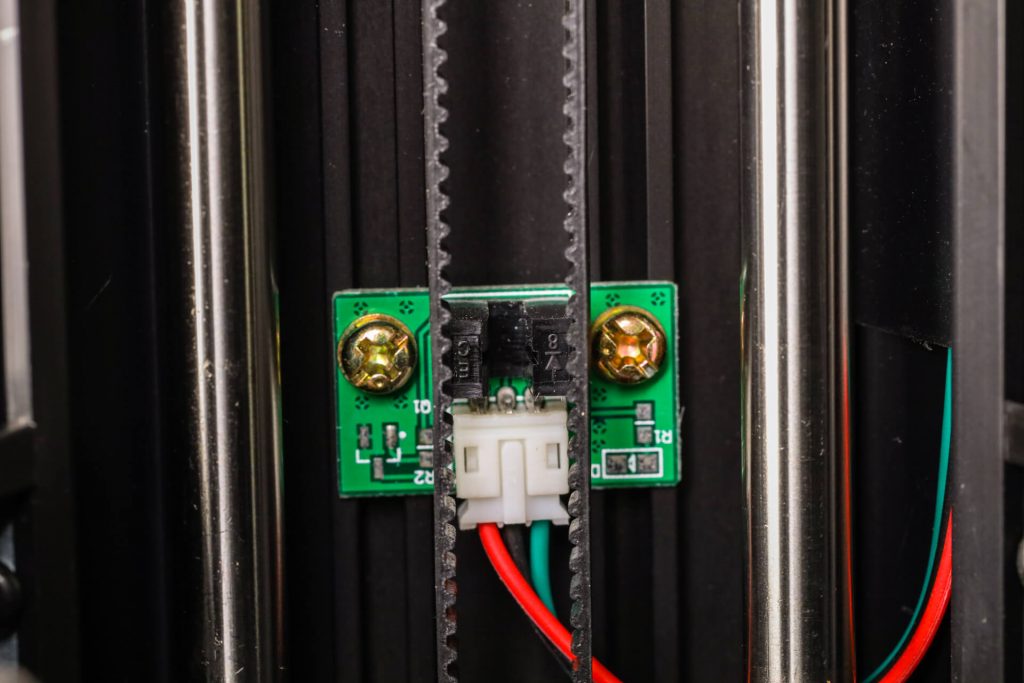
The Monoprice Mini Delta uses an optical endstop. The other common type are mechanical switches.
In the optical endstop there is basically a light, and a light sensor. The light should always be on while the printer is turned on (you won’t be able to actually see the light on).
On the other side of that gap in the black plastic is a sensor to see if the light is visible.
There will be something on the 3 carriages that protrudes out and will block the light between the light and sensor in the optical endstop once it reaches a certain height.
Endstops help your 3D Printer know where the nozzle is, so it is crucial that they are working and remain accurate.
Now let’s see if there is a chance your Monoprice Mini Delta optical endstop is having an issue.
Diagnosing a Problem With Endstop
We noticed our printer having issues when trying to print. At the beginning of each print the 3D Printer needs to know where the nozzle is. To do this it goes to the home position.
For each of the 3 carriages, it will move it up quickly until the optical endstop senses no light. Then it will go down a little bit, then go up slowly to double check the measurement.
What we noticed is that it worked as normal for two of the carriages on the delta.
However for one of the carriages, it never moved up, it only moved down a little bit once.
At that point we had at least one of the following problems:
- Debris in the Monoprice Mini Delta optical endstop
- A faulty endstop
- A bad wire or wire connection between the endstop and board
- Unlikely, but maybe a stepper motor only turning one direction
- Something worse like a bad board
We’ll be covering the first step and second steps here.
Step 1 – Make sure you don’t have debris in the optical endstop. OK great now that that’s covered let’s move on. If nothing is blocking the endstop, and we don’t see an obvious wiring issue, we want to replace the optical endstop on the Monoprice Mini Delta.
So let’s cover how to replace a faulty optical endstop on a Monoprice Mini Delta.
Replacing Mini Delta Optical Endstop
Keep in mind, one option is before buying a new endstop you might swap endstops and see if the problem moves to the other carriage. That will indicate it truly is the endstop itself that is the problem.
There is a trick to the optical endstop on a Monoprice Mini Delta, which is the reason I decided to write this article.
Removing the endstop sensor is very simple actually, but slight care can save you headache when trying to mount the new endstop.
In the extruded outer corner frame, there are two slots. In each of these slots is a sort of captive nut that can slide up and down in the slot.
Chances are, you want to keep the old endstop location. You want to put the new endstop in the same location as the old one.
So be careful not to tip the 3D Printer while an endstop is not screwed in to the nuts or they can slide around and be difficult to line up.
Testing New Mini Delta Endstop
This sort of goes without saying but you’ll want to test the 3D Printer after you make the change.
The goal is to make sure the problem is actually fixed and all the optical endstops are working on your Monoprice Mini Delta.
If the Endstop Wasn’t the Problem
If this didn’t fix the problem, you’ll need to check out that bullet point list I made above.
The next most likely issue is a wiring problem with the optical endstop. Make sure the 3 pin header is properly connected to the endstop itself.
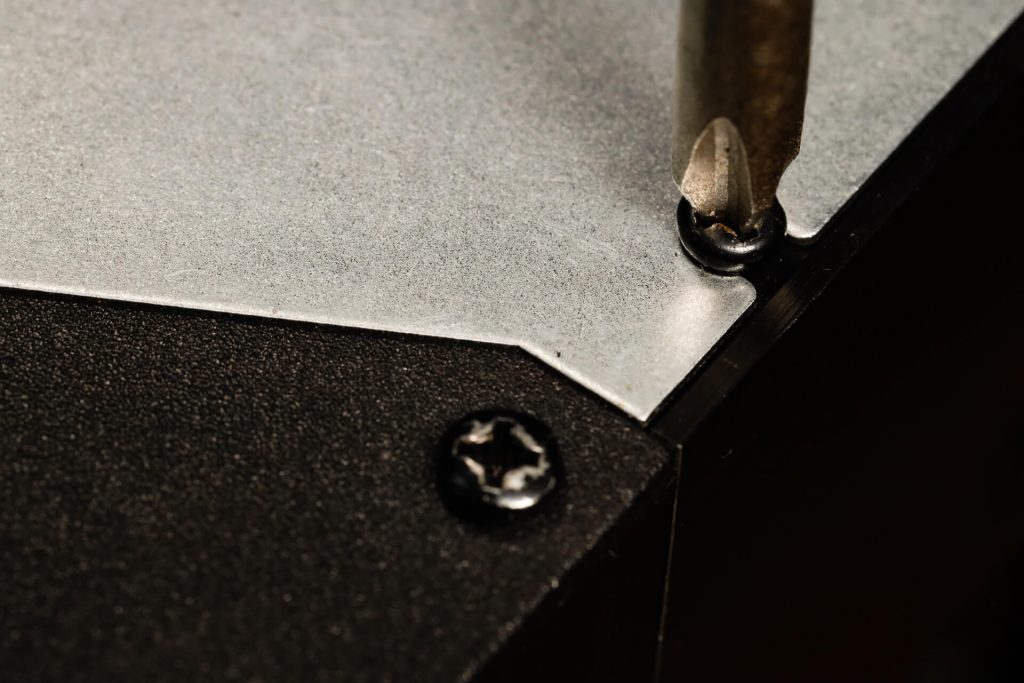
You should also take off the bottom cover which is held in by 6 machine screws. I used a Phillips 2 screwdriver to get them out.
As you are removing the cover, be careful of the short wire between the cooling fan and the board. I found it easiest to carefully remove the wire and set the whole assembly aside.
Now that you have access, check to make sure all the wires are properly plugged in to the board.
If this didn’t solve the problem, we’re at a point now where it’s hard for me to help you fix it. Sorry! Hope your problem is fixed at this point.
Other Suggested Articles
At Kinvert we write about a lot of STEM related topics.
Since you’re here it’s likely you’d be interested in What is ABS, What Does ABS Stand For, Flexible TPU Filament, and 3D Printer Repair.
If you are at a school or you’re looking in to a makerspace, check out School Makerspace – How to Create a Makerspace in Your School, and Best School 3D Printer for Library or Classroom.
There is a comment section below for any questions and comments.
Hope this helped!